MicroStrategy ONE
Add Functionality with a Custom Application Delegate in iOS
Every iOS application has a delegate object that conforms to the UIApplicationDelegate protocol. Your app delegate object manages your app’s shared behaviors. The app delegate is effectively the root object of your app, and it works in conjunction with UIApplication to manage some interactions with the system. In iOS 12 and earlier, you use your app delegate to manage major life cycle events in your app. Specifically, you use methods of the app delegate to update the state of your app when it enters the foreground or moves to the background. The app delegate of an application is defined in the Xcode project configuration and is instantiated by iOS when the application launches. See the iOS Developer Library for more information about the UIApplicationDelegate protocol.
The template Xcode project in MicroStrategy iOS Library SDK is preconfigured with its own internal app delegate class, called DossierAppDelegate, but it is possible to configure a custom app delegate class that adds additional functionality when the application launches and when state transitions occur. This can be done by extending the MicroStrategy Library internal app delegate class and overriding the different methods defined in the UIApplicationDelegate protocol.
Create a custom application delegate class that extends DossierAppDelegate
- Set up the environment to use the Library Mobile for iOS project. You are using this project as the basis for your customizations.
-
You are going to create a custom application delegate class that extends DossierAppDelegate. Start by opening the template project and use Xcode to open the MicroStrategyLibrary.xcodeproj file.
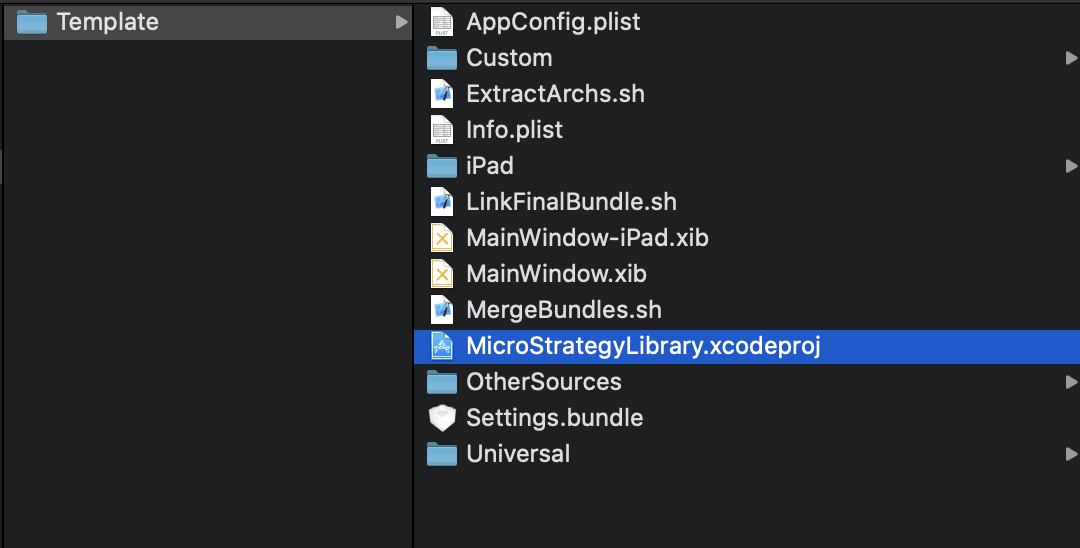
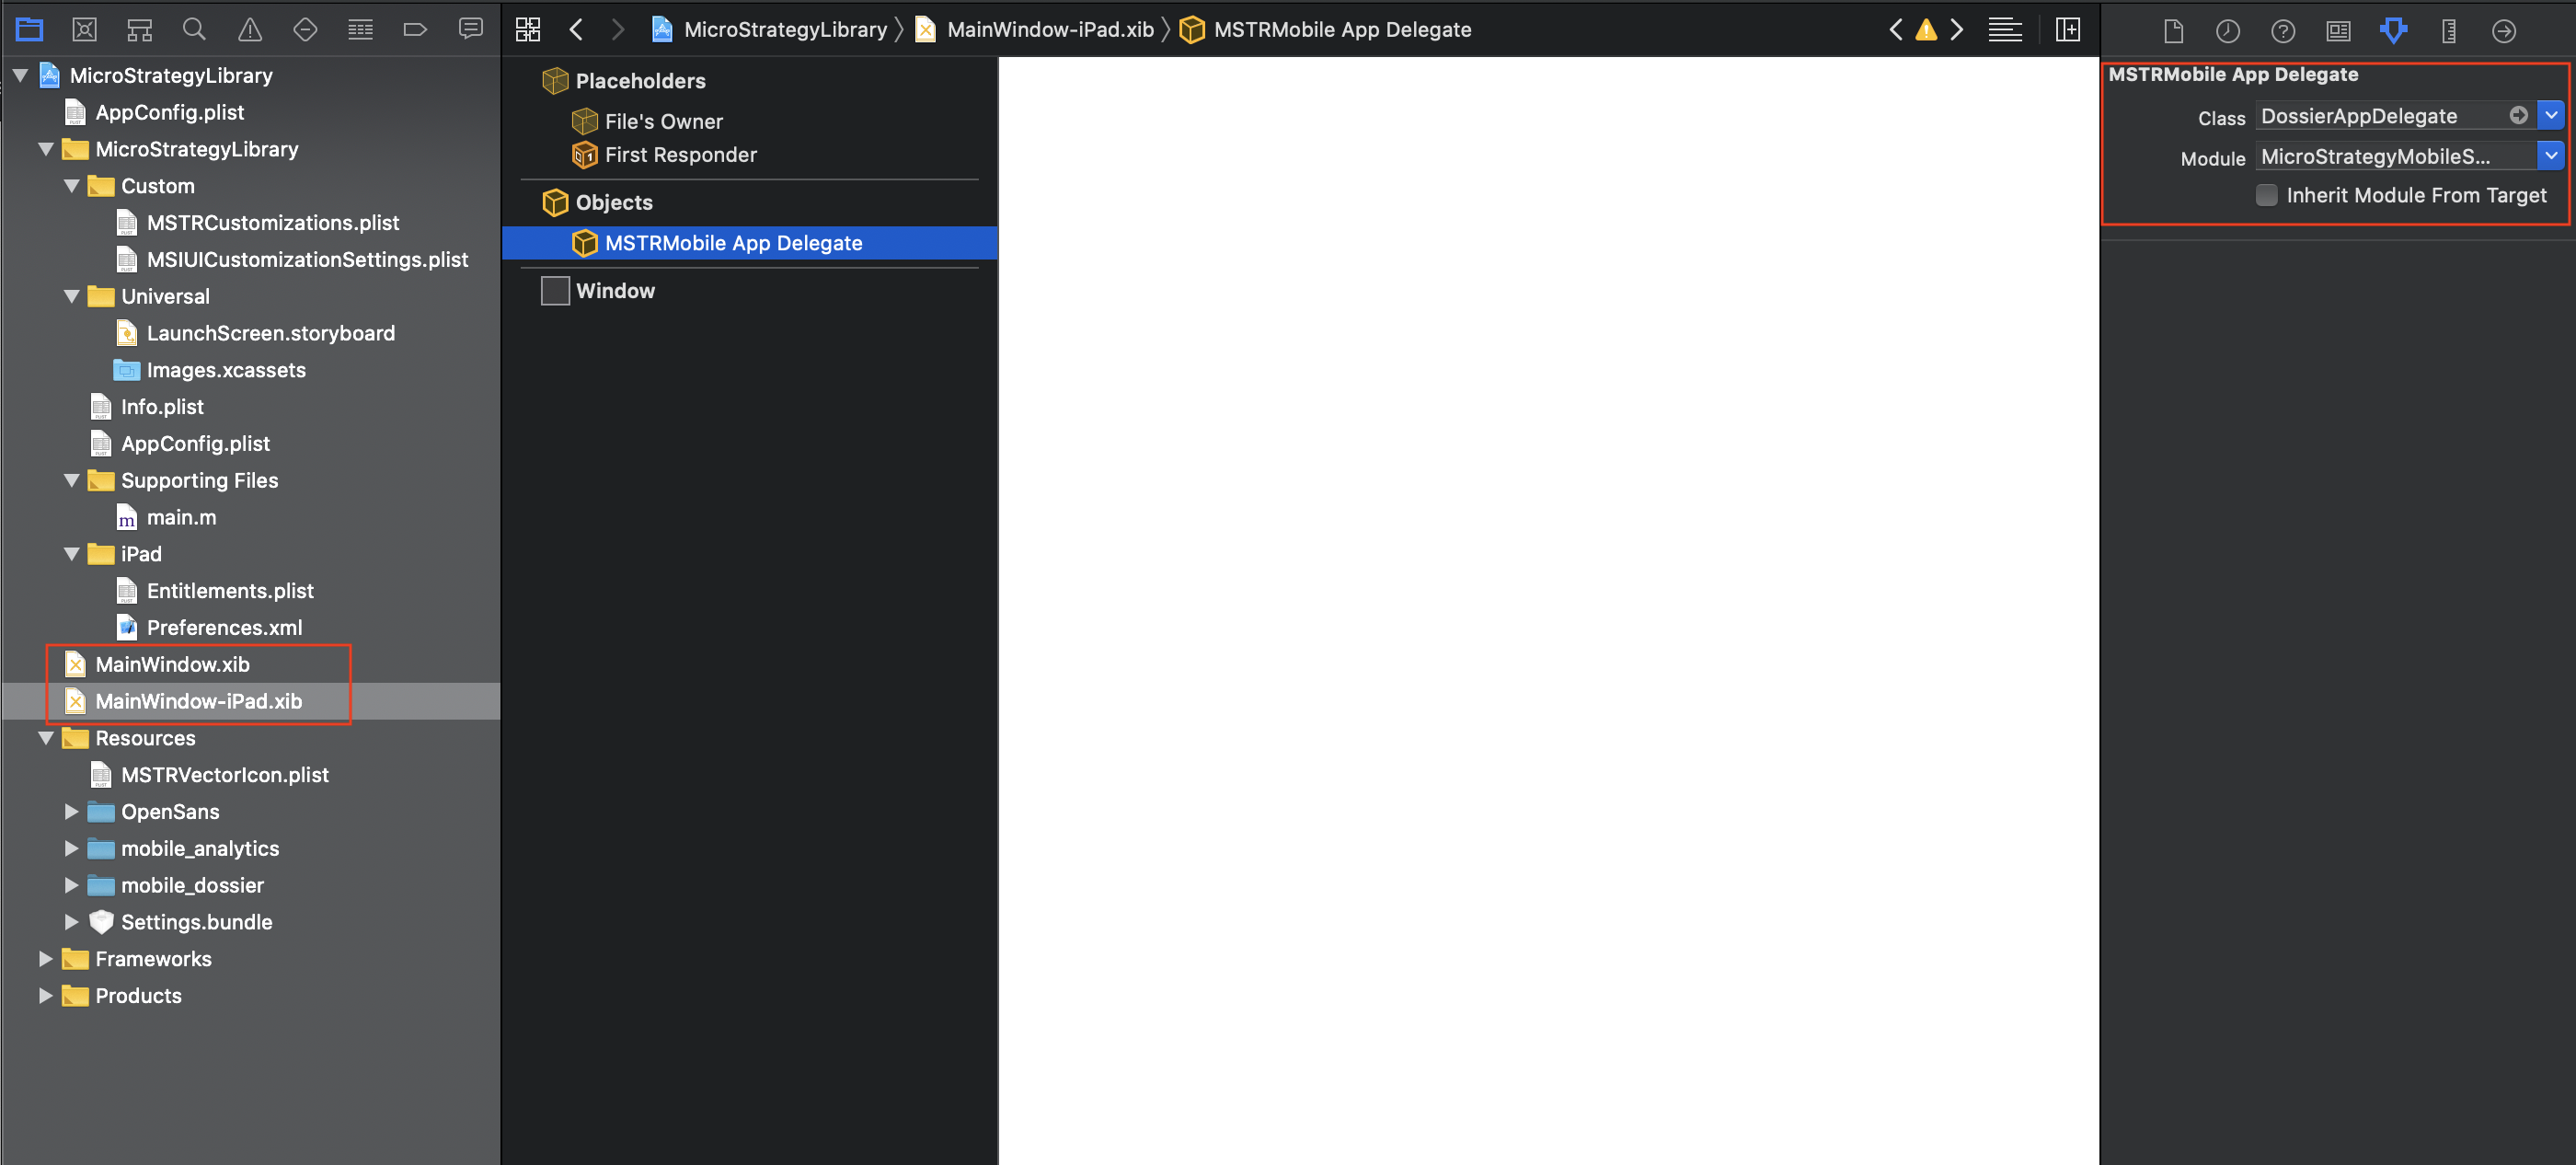
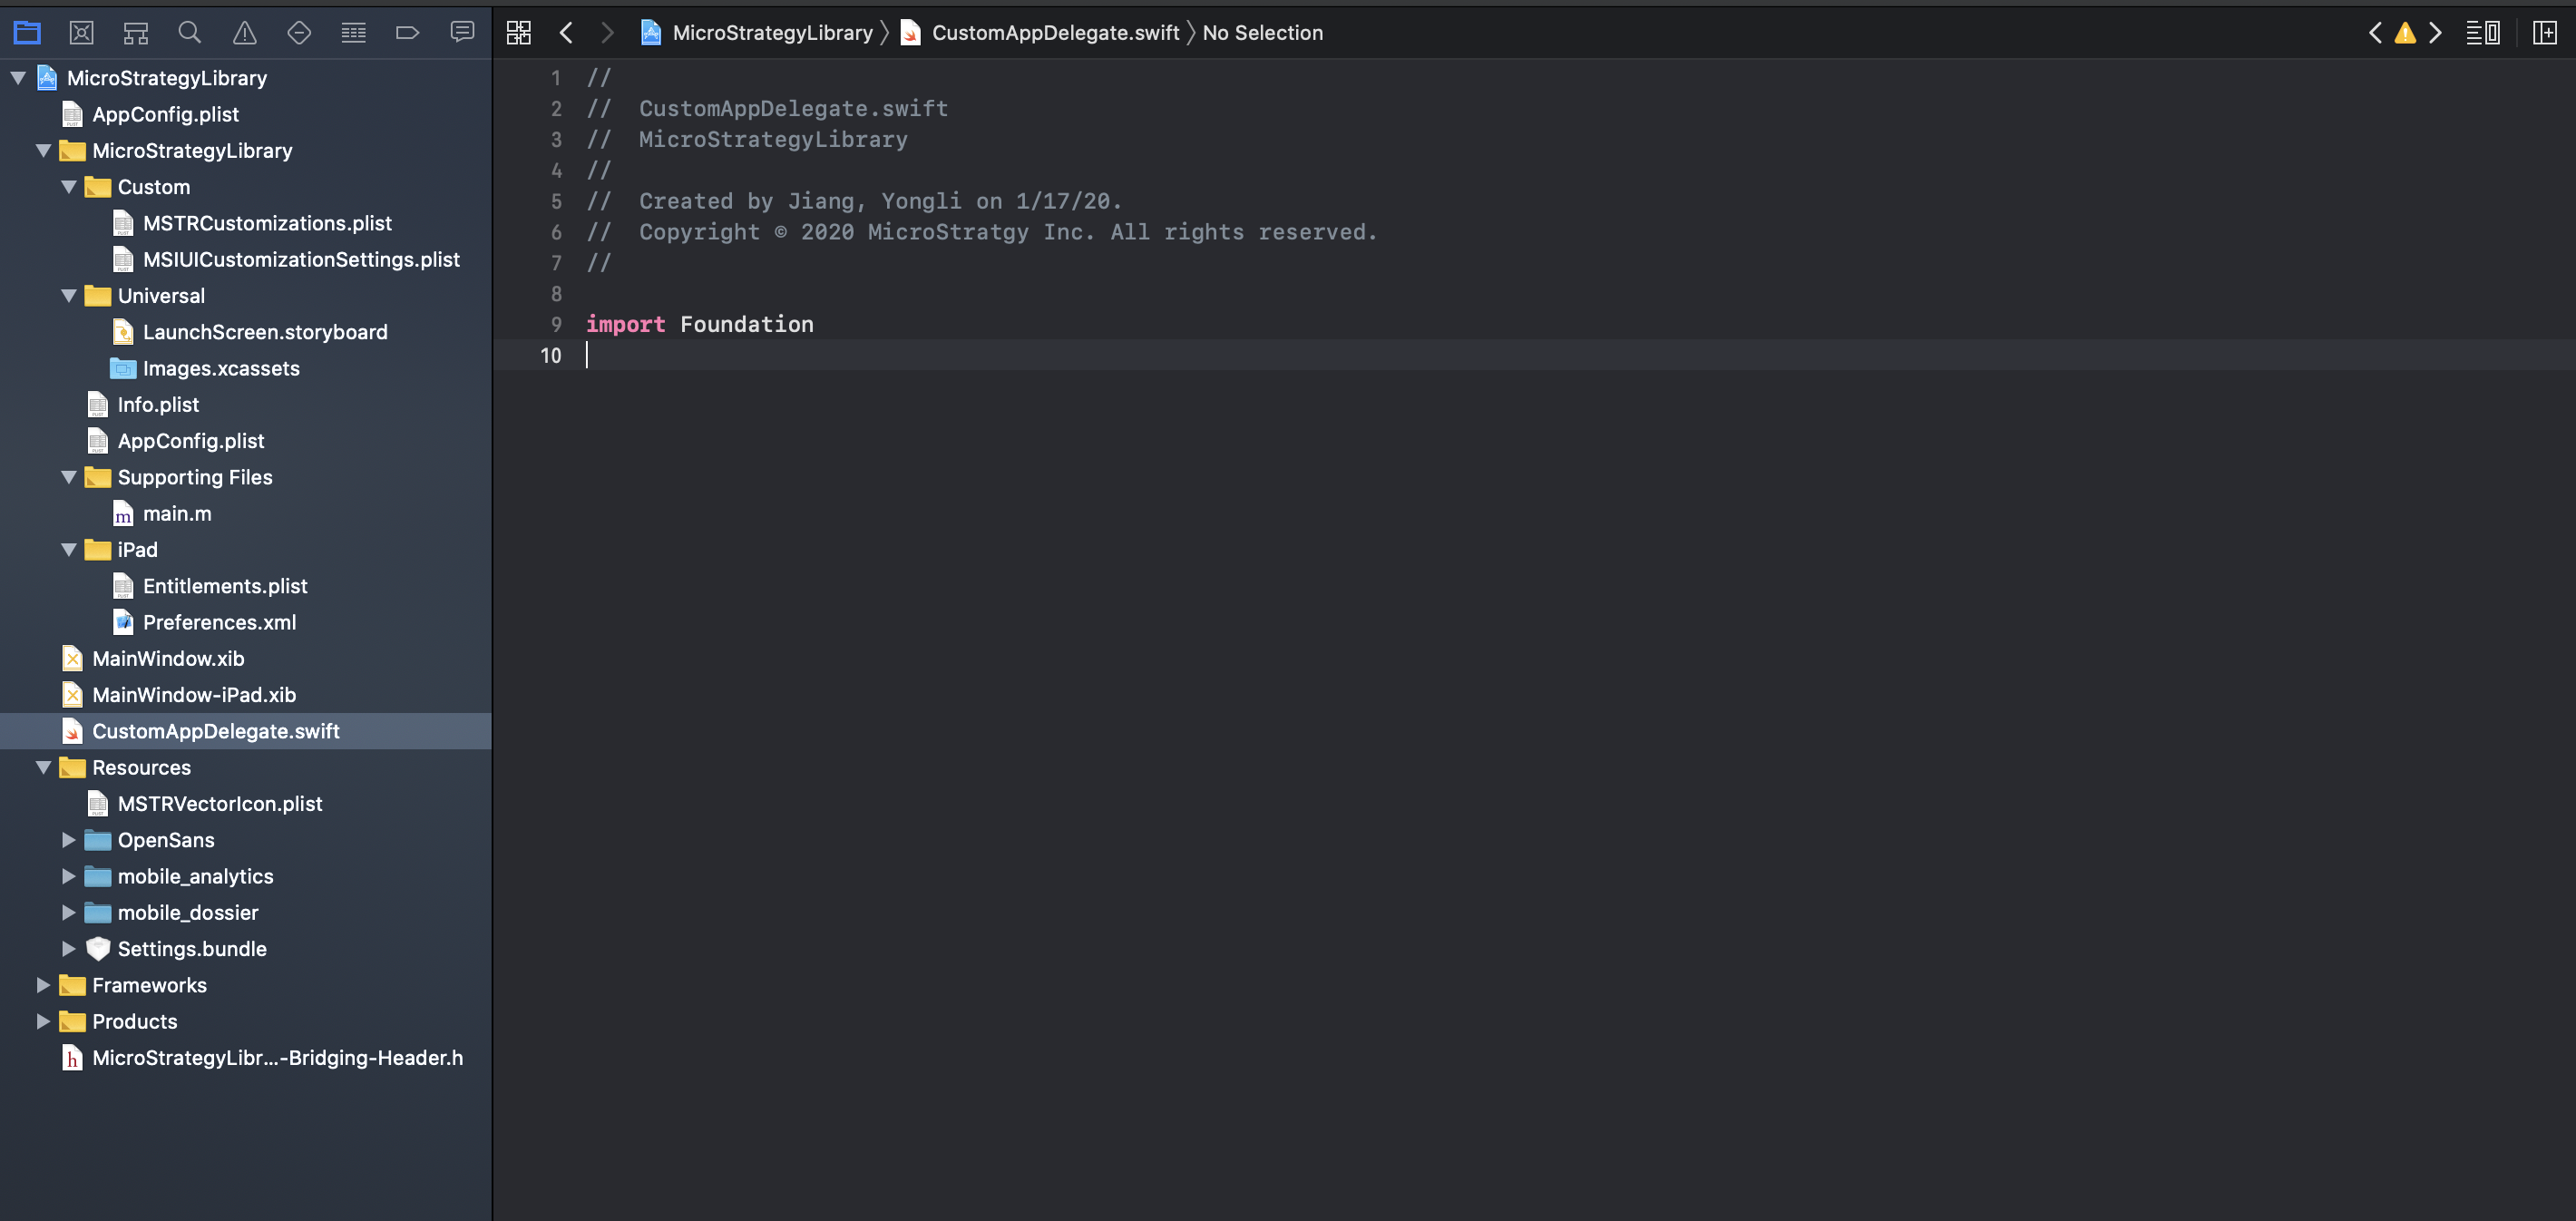
The original state of the template project appears as shown below. There are two main xib files: MainWindow.xib for iPhone devices and MainWindow-iPad.xib for iPad devices. The application delegate is defined inside the main nib file. In the template project, DossierAppDelegate is used as an application delegate.
-
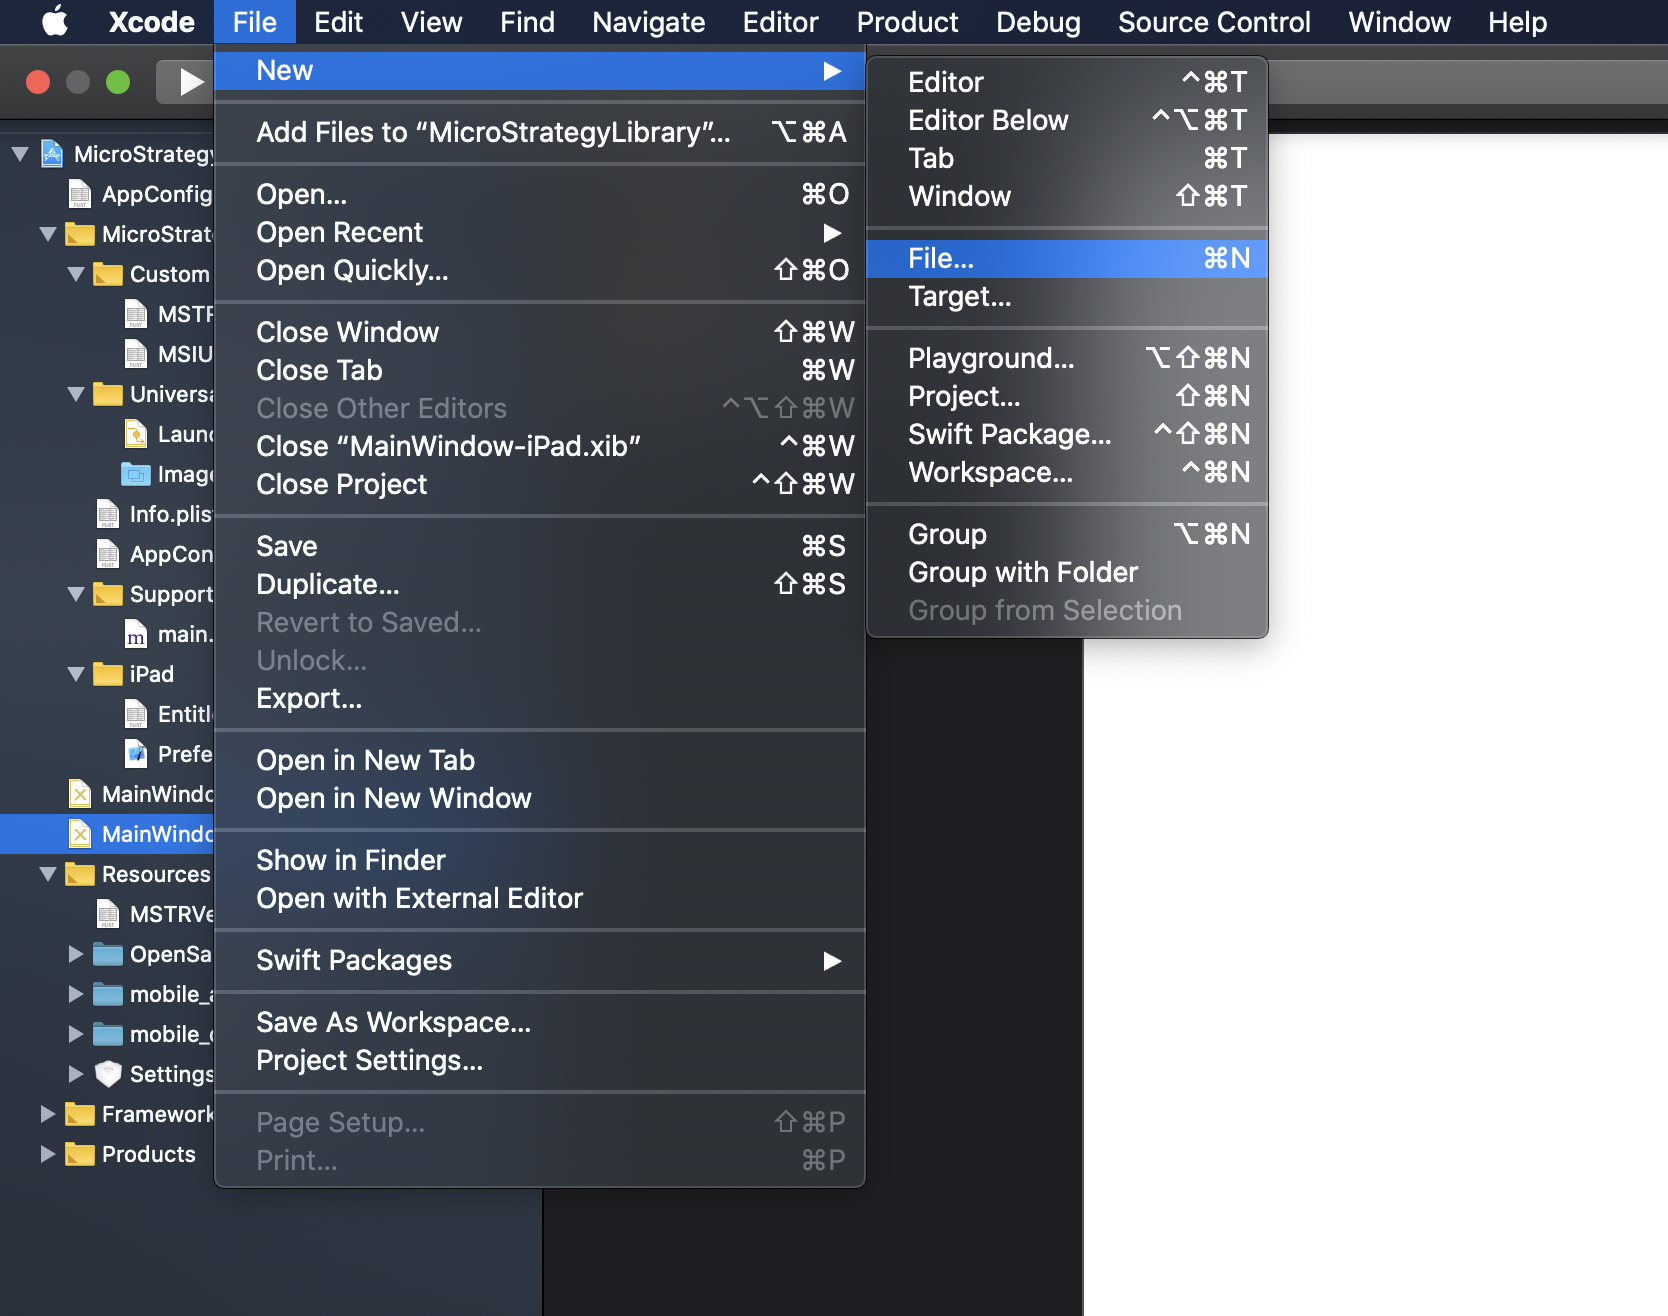
To create a new Swift file, choose File > New > File and choose the Swift file type. Give the file a meaningful name. such as CustomAppDelegate.
-
Click Create Bridging Header.

An empty Swift file is added to the template project.
- Modify the new Swift file. Import the MicroStrategyLibraryMobileSDK module as shown on the screen in step 4.
- Define a class extended from DossierAppDelegate and provide implemented functions for UIApplicationDelegate as necessary.
- Call super implementation to avoid missing important features provided in the MicroStrategy Library SDK, as shown in line 15 of the screen in step 4.
- Add a declaration of @UIApplicationMain inside the class you defined in step 2. See line 12 in the screen below for reference. This special attribute tells the Swift compiler to generate code to launch your application using default settings. If you need to extend from UIApplication, you should remove it.
- Since @UIApplicationMain is already declared in CustomAppDelegate, you should comment out all of the lines in main.m.
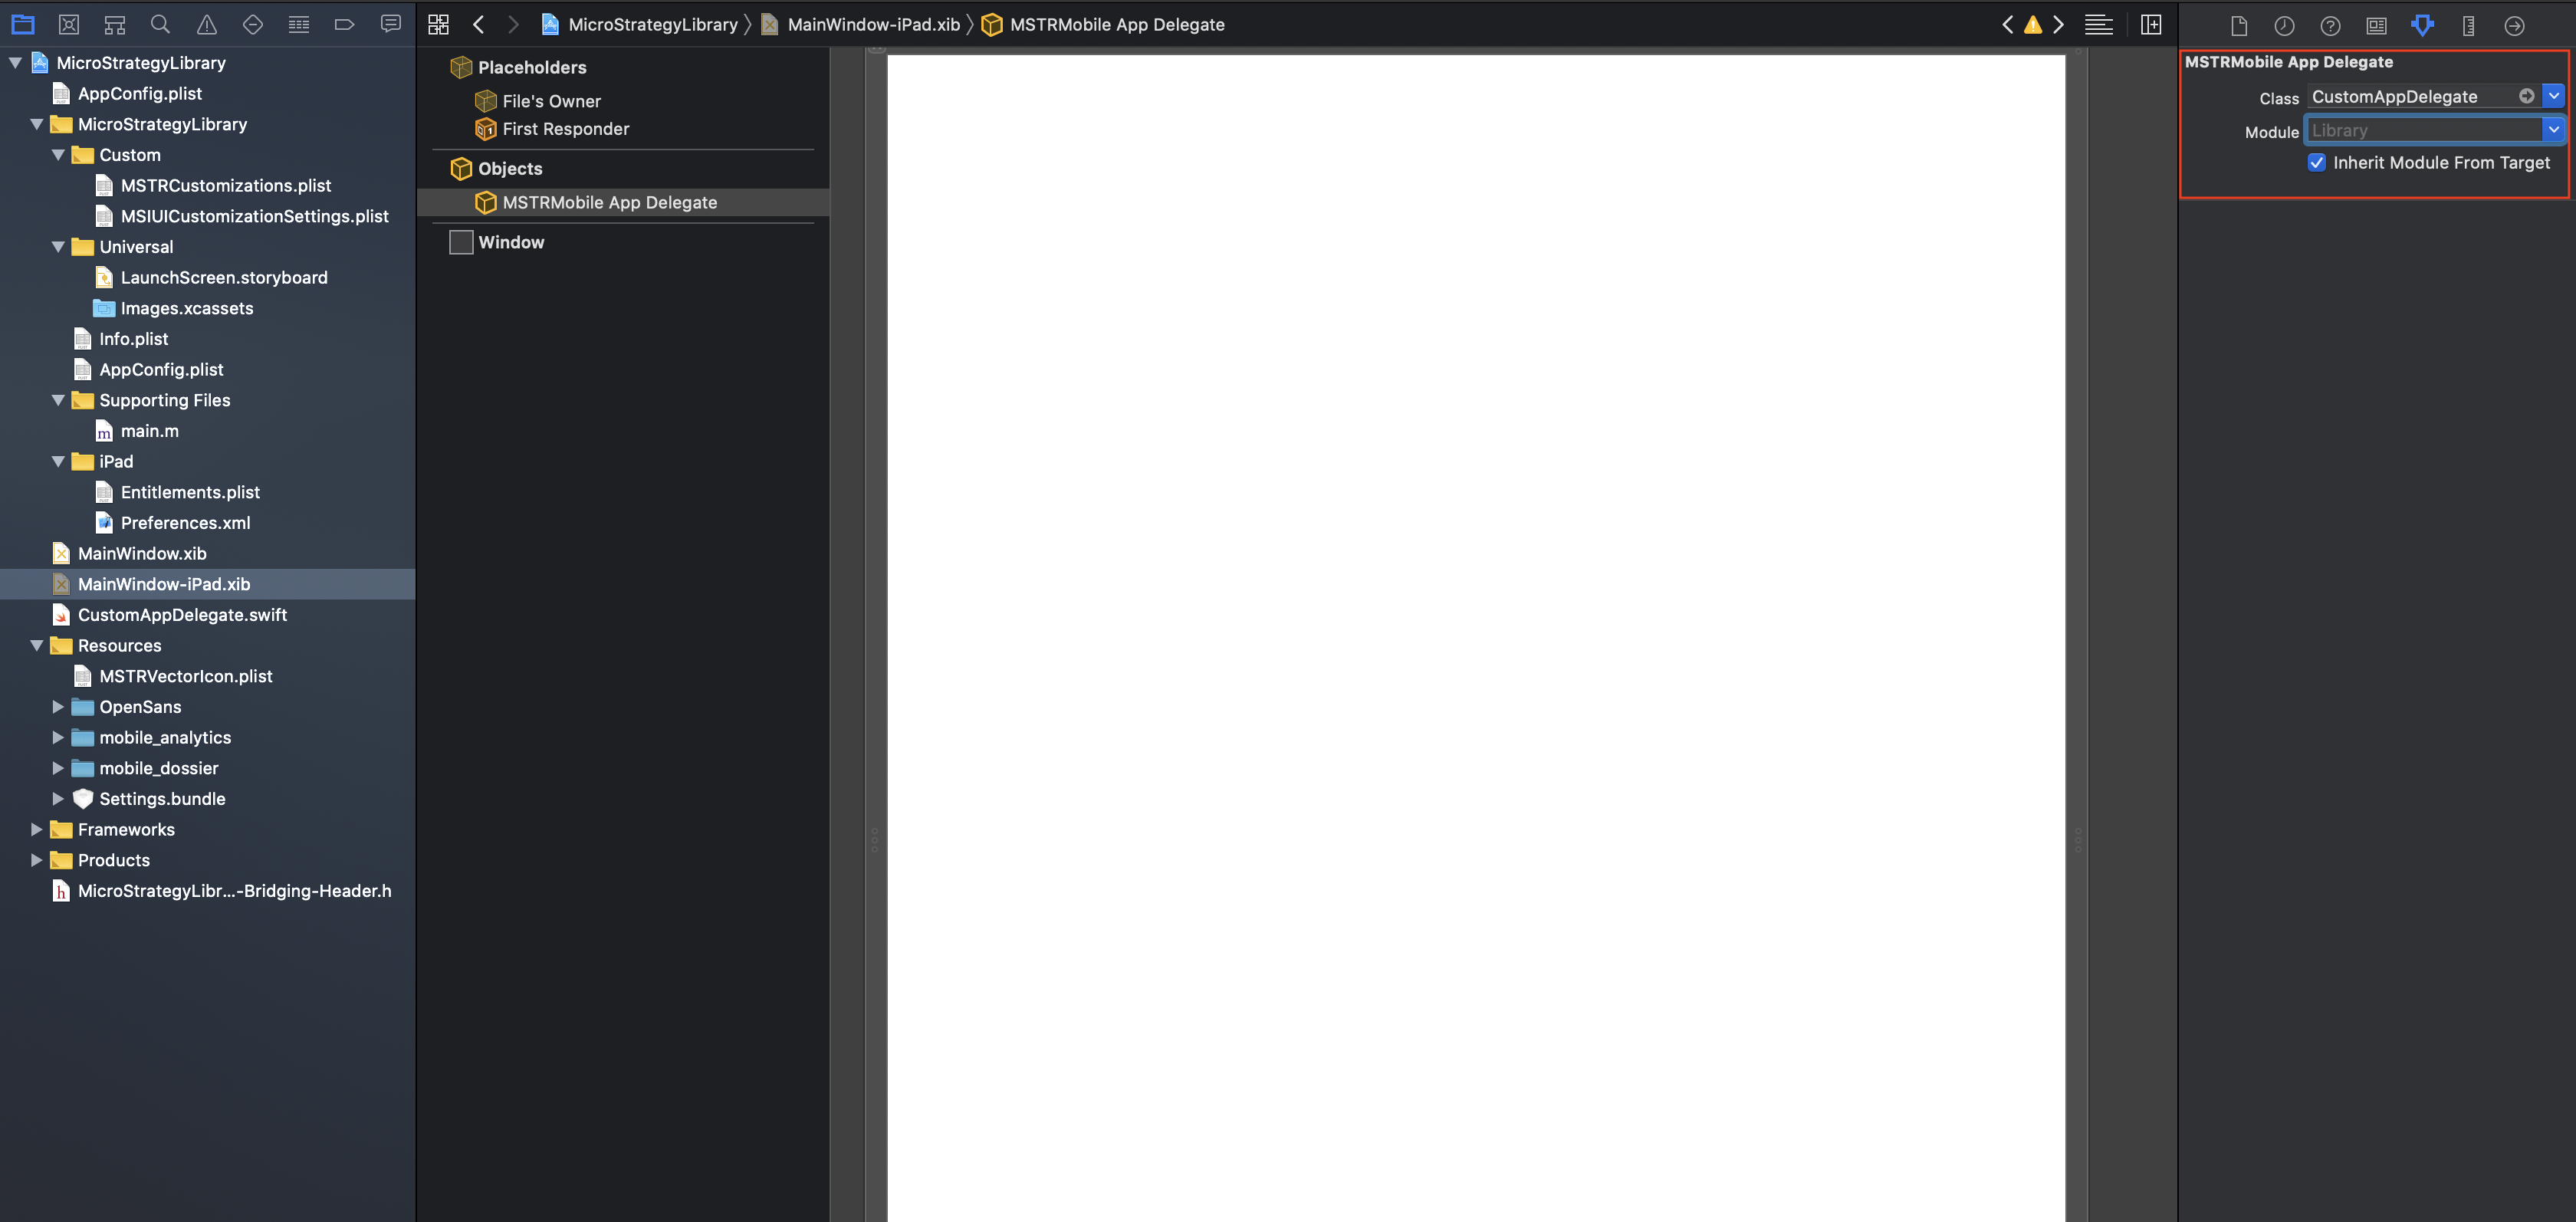
- In MainWindow.xib and mainWindow-iPad.xib, modify the MSTRMobile App Delegate class to CustomAppDelegate. Clear the module, so it uses the target as its module.
- Build and run your application.
Implement and use CustomAppDelegate