MicroStrategy ONE
Adding a custom data connector
To add a custom data connector to the many external data source connections that MicroStrategy supports automatically, you need to first write the Javascript code to create the data connector object, enable URL file upload, and then register the new connector with MicroStrategy so that it appears on the same page as the out-of-the-box connections. Once a data connector has been created and registered and URL file upload enabled, any user with Data Import privileges can use the connector.
-
Only a user with administrative privileges can add a connector on the Intelligence Server. Code samples are provided for connecting to CSV, JSON, and Excel files, connecting to multiple tables, and connecting to data with a schema that you define.
- Enable URL file upload
- Open MicroStrategy Developer.
- Right-click the project you are going to work with and select Project Configuration.
- On the Project Configuration screen:
- On the left, navigate to Governing Rules -> Default -> Import Data.
- On the right, select the checkbox for Enable URL file upload via and then select all the checkboxes below it - HTTP/HTTPS, FTP, and File.
- Click OK.
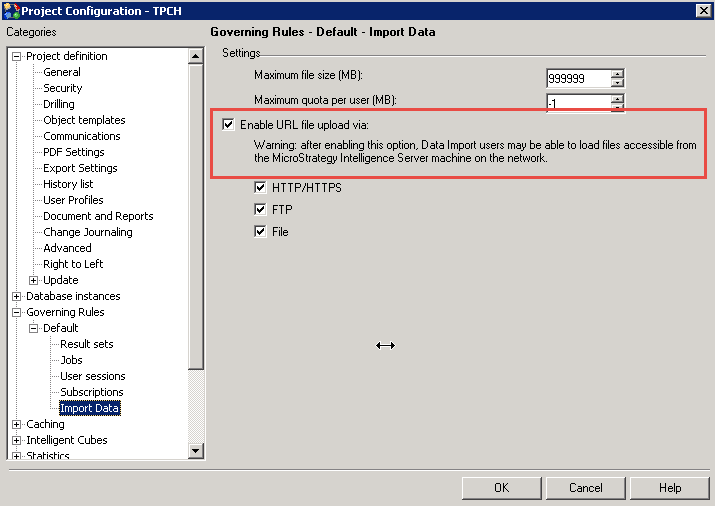
- Close MicroStrategy Developer.
-
An administrator has to register a data connector in order for it to appear on the page with all of the out-of-the-box external data connections. Once a data connector is registered, users with Data Import privileges can access and use the new data connector just like they do the other connections. When a user clicks the icon for the new data connector, the interactive user page associated with the data connector is displayed.