MicroStrategy ONE
Rebrand MicroStrategy Mobile for iOS
You can rebrand the MicroStrategy Mobile application for iOS by changing the name, the application icon, and the splash screen, and even adding animation to the splash screen. The resulting mobile application then has your custom look and feel.
To create a rebranded application, perform the following steps.
-
Set up the environment to use the MicroStrategy Mobile project
-
Open the MicroStrategy Mobile project and add the MicroStrategy customizations property file
To deploy multiple mobile applications built using the MicroStrategy Mobile project, see Deploying Multiple MicroStrategy Mobile projects.
A detailed explanation of each of these steps is provided below.
-
Set up the environment to use the MicroStrategy Mobile project
Set up the environment so that you can use the MicroStrategy Mobile project as the base for your customizations.
- Open
the MicroStrategy Mobile project and add the MicroStrategy customizations
property file
- Open MicroStrategyMobile.xcodeproj.
- In Xcode, right-click the Custom folder under MicroStrategyMobile and click Add files to "MicroStrategyMobile".
- On the dialog for setting properties that pops up, do
the following:
- Navigate to MSTRCustomization.plist and select it.
- For Add to targets, make sure that both check boxes are selected—MicroStrategyMobileiPhoneandMicroStrategyMobileiPad—if you intend to run this animation on both devices.
- Click Add.
-
Perform the desired rebranding actions
You are ready to perform the desired rebranding actions.
-
Change the name of the application
To perform this rebranding, you configure one property.
-
If the appropriate property list file (Info_IPhone.plist or Info_IPad.plist for iPhone and iPad respectively) is not already open in the editor, double-click it.
-
Configure the Bundle display name property
This property stores the value of the name used for the application. To give your application a custom name, update the value of this property with the name of your application.
-
Save your changes.
-
-
Change the URL scheme for the application
If you intend to publish your rebranded application in the App Store, you need to change the URL scheme as described in Deploying Multiple MicroStrategy Mobile Projects. If you fail to do this and you have preconfigured your custom application as described in Preconfiguring MicroStrategy Mobile, your application will conflict with the out-of-the-box MicroStrategy application for users who have downloaded both applications.
-
Change the icon of the application
The icon for the application is a PNG file. To change the icon for the application, you create custom PNG files and use them to replace the icon images in Images.xcassets. The images must be a specific size in pixels, as shown in the table below.
iPhone 6 Plus
iPhone 5 and 6
iPhone 4s
iPad and iPad mini
ipad 2 and iPad mini
180 X 180
120 X 120
120 X 120
152 X 152
76 X 76
One way to change the application icon is described below:
-
Under MicroStrategyMobile, expand the Resources folder, then Images.xcassets, then select iPhoneAppIcon if you are customizing the application for iPhone or iPadAppIcon if you are customizing the application for iPad.
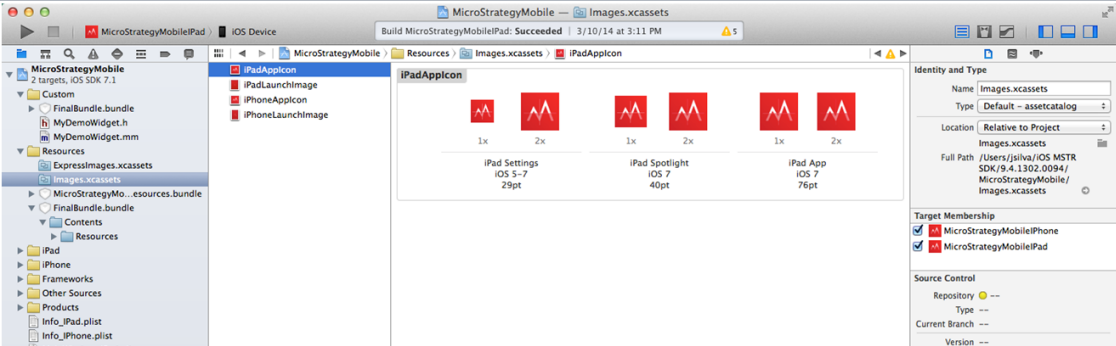
-
Delete the existing PNG files that you want to replace.
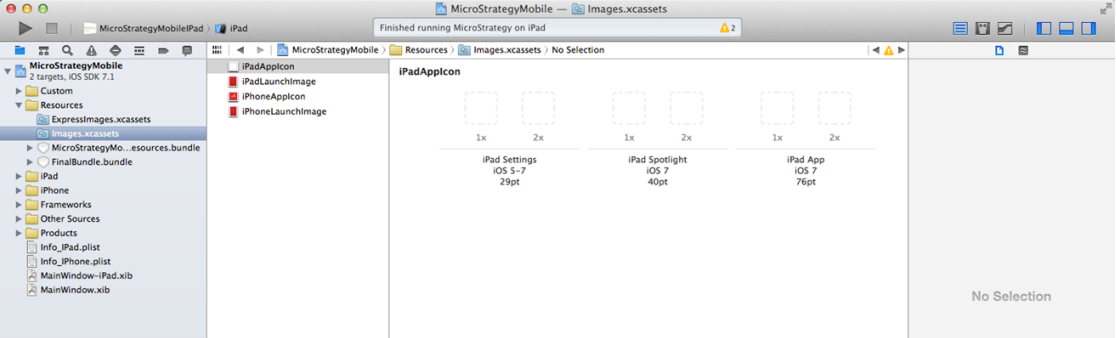
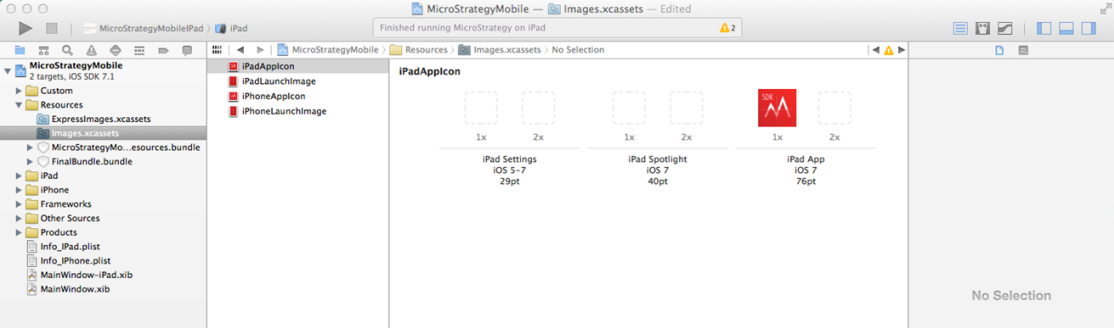
-
Drag the new PNG files and drop them on the appropriate icon.
 .
. -
Save your changes.
-
-
Change the splash screen of the application
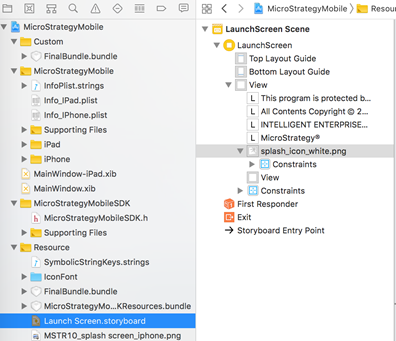
The splash screen for both iPhone and iPad is Launch Screen.storyboard. You can modify the text, icon, and background color for the splash screen of the application through Xcode.
In previous versions, the splash screen for the application was a PNG file, which was stored in two locations—Images.xcassets and under either the iPhone or iPad folder. This older method does not support the new FaceID iPad Pro.
One way to change the splash screen is described below:
- Open the MicroStrategyMobile project in Xcode.
-
Select the Launch Screen.storyboard. All the elements on this screen are displayed.
- To change the background color:
- Click on the background.
Choose the background color from the Background drop-down in the View panel on the right.

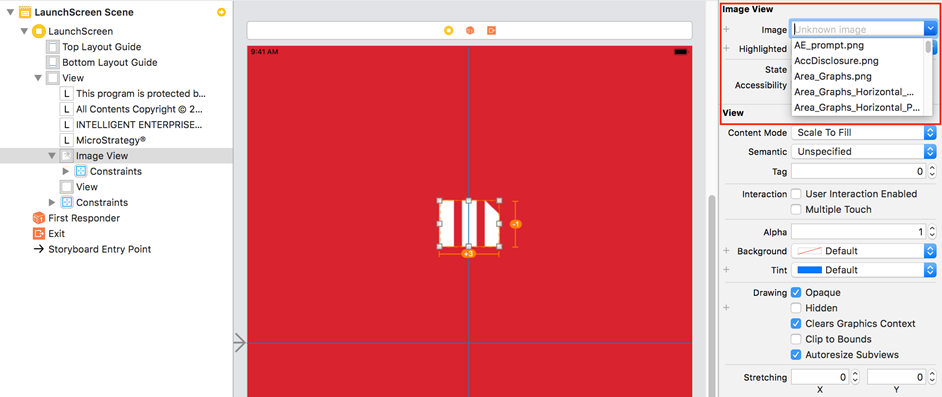
- To change the splash screen icon:
- Put your new icon image file in Image.xcassets.
- If the new icon image is a different size than the one being replaced, delete all old constraints and create new constraints for the new image.
- Select the splash_icon_image.png.
Choose your new icon image file from the Image drop-down in the Image View panel on the right.
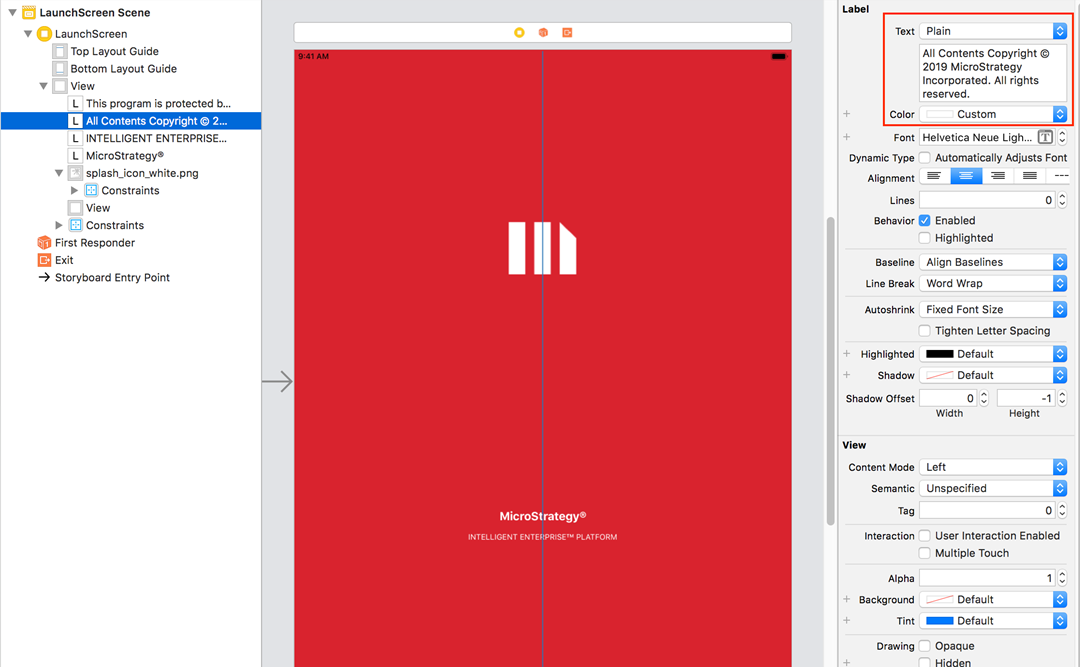
- To change text on the splash screen:
- Select the text you want to change.
Change the text content, type or color in the Label panel on the right.
- Open the MicroStrategyMobile project in Xcode.
-
Add 3D animation to the splash screen
3D animation effects can be added to the launch screen for MicroStrategy Mobile. The animation effects are based both on an animation image that you provide and the 3D animation stye that you choose to apply. The animation image is very important because it is part of the launch screen and its colors are used by the animation. Guidelines for designing or choosing a visually compelling animation image are provided below:
- The image should have a transparent background.
- The colors of the image should look good against the black background of the MicroStrategy Mobile screen.
- The image type can be any one that Apple supports.
-
The smallest recommended sizes to avoid de-pixelated display are shown below:
iPad
480 pixels X 360 pixels
iPhone
160 pixels X 240 pixels
-
The largest recommended sizes to avoid excessive memory consumption are shown below:
iPad
1004 pixels X 748 pixels
iPad Retina
1496 pixels X 2008 pixels
pre-iPhone 5
640 pixels X 960 pixels
iPhone 5
640 pixels X 1136 pixels
-
Add your custom animation image. The instructions differ, depending on which version of Xcode you are using.
- If you are using Xcode 8.2 or earlier, add the image to MicrostrategyMobile ->Custom -> FinalBundle.bundle ->Content -> Resources .
- If you are using Xcode 8.3 or later, add the image to MicrostrategyMobile -> Resources -> FinalBundle.bundle ->Content -> Resources and delete everything under Custom -> FinalBundle.bundle.
- If you are using Xcode 8.2 or earlier, add the image to MicrostrategyMobile ->Custom -> FinalBundle.bundle ->Content -> Resources .
-
Add MSTRCustomizations.plist to the MicroStrategyMobile -> Custom folder, if it has not already been added.
MSTRCustomizations.plist is not included in the out-of-the-box MicroStrategyMobile Xcode project. It must be added manually as follows:
- Expand MicroStrategyMobile, right-click Custom, and choose Add Files to "MicroStrategyMobile".
Select MSTRCustomizations.plist.
- Under Add to targets, select the check box for MicroStrategyMobileIPad, MicroStrategyMobileIPhone, or both.
- Click Add.
- Under MSTRCustomization.plist,
add and configure the following two properties:
IntroAnimationImage
Set this property to the string that represents the name of the image to be used by the animation.
The default value of this property is "null".
IntroAnimationType
Set this property to a numeric value that indicates whether you want to animate the splash screen and which animation style you want to apply. There are currently two animation styles available. The possible values are shown below:
0
No animation (default)
1
Animate the launch screen using the Glowing Globe 3D style
2
Animate the launch screen using the Multiple Logo Spinning 3D style
The 3D animation effects occur when the application is first started, restarted, or launched with a configuration link. They do not take effect when the application is launched from an Express sharing link or when the application is suspended and then brought back from the background.
-
Your application can use custom help that meets the following requirements:
- Your help files must reside on a web server that your users can access.
- Your help must include navigation links, such as links to return to the table of contents and navigate to the previous topic.
- Your help must include a Close or Exit button, which allows users to close the help and return to the mobile application. The button must be a link, using the URL format http://action/?action=close.
To ensure that your help site is mobile-friendly, you can use pre-built mobile frameworks, such as jQuery Mobile.
To use an English version of custom help, follow the steps listed below. If you want to customize other language versions of help, make the same changes in the appropriate language folders.
- Expand Resources under MicroStrategyMobile in Xcode, then FinalBundle.bundle, then Contents, then Resources, then en.lproj.
- Copy IPhoneStrings.strings.
- Navigate to or create the following path under MicroStrategyMobile in Xcode: Custom, then FinalBundle.bundle, then Contents, then Resources, then en.lproj.
- Paste IPhoneStrings.stringsunderen.lproj.
- Open IPhoneStrings.stringsand set the values of the following parameters to point
to your custom help files:
- IPAD_HELP_URL
- IPHONE_HELP_URL
- Save your changes.
3D animation is not supported for an iOS 4.x device.
To add 3D animation to the splash screen, do the following:
-
-
Build the project to confirm that the application compiles and deploys successfully
-
Make sure that the appropriate scheme (MicroStrategyMobileIPhone or MicroStrategyMobileIPad for iPhone and iPad respectively) is correctly selected.
-
Click Add Missing Constraints.
-
Click the Run button to compile and deploy the application to a simulator. Confirm that it compiles and deploys successfully.
To upload the application to a device, set the destination in the scheme to the mobile device and then build and run. For other requirements on deploying to a device, refer to documentation from Apple. You can access useful links to the Apple documentation from the Distributing iPhone or iPad Applications topic.
-